If your dishwasher isn’t cleaning dishes the way it used to — leaving food residue on the top rack, missing spots on glasses, or producing a faint rattling during the wash cycle — a clogged spray arm is often the culprit. Spray arm maintenance is one of the most overlooked dishwasher care tasks, but it’s also one of the easiest and most impactful things you can do to restore your dishwasher’s performance.
In this step-by-step guide, we’ll show you exactly how to remove, clean, and reinstall your dishwasher spray arms. Whether you’re in Coquitlam, Port Coquitlam, or Port Moody, this is a simple maintenance task any homeowner can handle.
What Do Dishwasher Spray Arms Do?
Your dishwasher has one or more spray arms — typically one at the bottom of the tub, one in the middle, and sometimes one at the top. Each arm is a plastic rotating component with small holes (nozzles) that spray pressurized water across the dishes during the wash cycle. The arms spin as water is forced through them, covering all angles inside the dishwasher.
When those nozzle holes become clogged with mineral deposits, food particles, or debris, the water pressure drops, the spray pattern becomes uneven, and dishes don’t get properly cleaned. This is especially noticeable on the top rack, which depends on the middle spray arm.
Signs Your Spray Arms Need Cleaning
- Dishes on the top rack come out with food still stuck on them
- Glasses are cloudy or spotty despite using rinse aid
- You can hear a rattling or uneven sound during the wash cycle
- Dishes on one side of the rack are cleaner than the other
- You can visually see debris or white mineral buildup in the spray holes
If you’re also noticing a smell from your dishwasher alongside poor cleaning performance, the filter may be overdue for cleaning too. See our related guide: Dishwasher Not Draining: Troubleshooting Guide.
What You’ll Need
- Toothpick, wooden skewer, or thin wire
- Soft brush or old toothbrush
- White vinegar
- Warm water
- Bowl or bucket for soaking
- Needle-nose pliers (sometimes needed for bottom arm removal)
Step 1: Empty the Dishwasher and Remove the Racks
Start with a completely empty dishwasher. Pull out the bottom rack fully and set it aside. If you’re cleaning the middle arm, also remove the upper rack by sliding it off its rollers or lifting it free after the rail end-caps are removed.
Step 2: Remove the Bottom Spray Arm
On most dishwashers, the bottom spray arm is held in place by a centre nut or a simple snap-lock. To remove it:
- Snap-lock type: Simply lift the arm straight up — it will unclip from the standpipe in the centre of the tub floor.
- Threaded nut type: Turn the locking nut counterclockwise to unscrew it (note: some dishwashers use reverse threads — try clockwise first if counterclockwise isn’t working).
- Screw-on cap: Some models have a plastic cap that you turn and then lift.
Check your dishwasher’s manual if you’re unsure how the arm attaches on your specific model.
Step 3: Remove the Middle and Upper Spray Arms
The middle spray arm is typically attached to the underside of the upper rack or to the water supply tube in the centre of the dishwasher. It usually unclips or unscrews similarly to the bottom arm. The upper arm (if present) is often screwed onto the inside roof of the dishwasher tub.
Step 4: Inspect the Spray Holes
Hold each spray arm up to the light and look through each nozzle hole. You should be able to see light through each one clearly. Blocked or partially blocked holes will appear dark or show visible white mineral deposits or food debris lodged inside. Also check that the arm itself spins freely on its hub — it should rotate easily with very little friction.
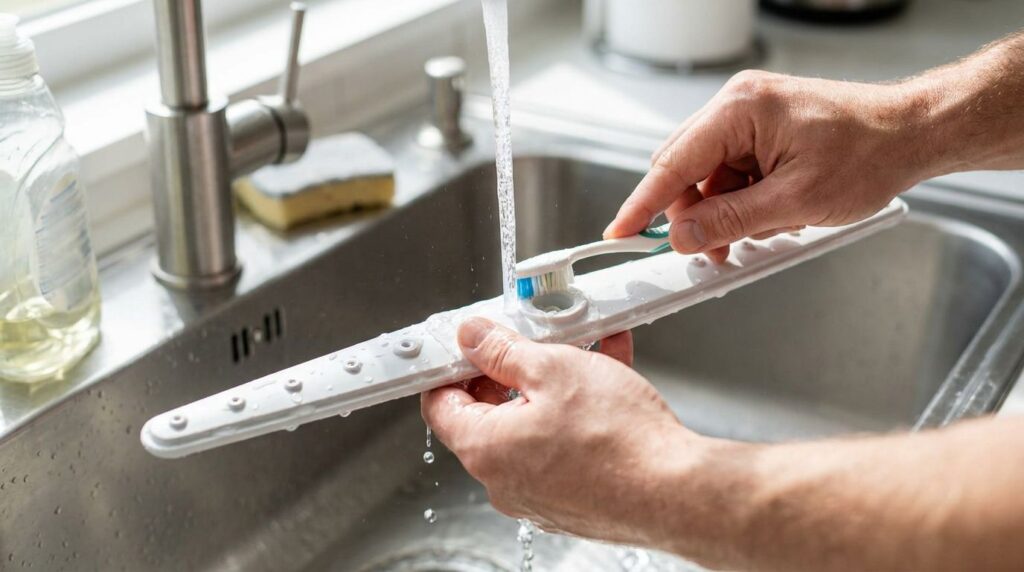
Step 5: Clear the Clogged Holes
Use a toothpick, wooden skewer, or thin piece of wire to carefully poke through each clogged hole. Work from the outside in, pushing debris back into the hollow interior of the arm. Avoid using metal objects that could enlarge or damage the precisely sized nozzle openings. Once you’ve loosened the debris in each hole, rinse the arm under running water to flush the interior.
Step 6: Soak in Vinegar for Mineral Buildup
If you have hard water (which is common throughout the Lower Mainland), white mineral scale builds up inside and around the spray nozzles. Soaking is the most effective way to dissolve this scale:
- Fill a bowl with a 50/50 mixture of white vinegar and warm water.
- Submerge the spray arms completely.
- Let them soak for 15–30 minutes.
- Scrub the exterior surface and around each nozzle with a soft brush or toothbrush.
- Rinse thoroughly under warm running water.
For heavy buildup, you can soak overnight or use a commercial descaler. For more on dealing with hard water residue, read: Why Your Dishwasher Leaves White Film on Glasses and How to Fix It.
Step 7: Rinse and Reinstall the Spray Arms
After soaking and scrubbing, rinse each arm thoroughly and shake out any remaining water and debris. Before reinstalling, clear the standpipes or hub connections of any scale or debris. Reinstall the arms in reverse order — upper first (if applicable), then middle, then bottom — making sure each arm clicks or threads securely into its mount and spins freely by hand after installation.
Step 8: Run a Test Cycle
Run an empty short wash cycle and listen for even, consistent water spraying. After the cycle, check the inside of the tub — the walls should be evenly wet all the way to the top. Load a set of dishes and run a full cycle. The improvement in cleaning performance should be noticeable immediately.
How Often Should You Clean Spray Arms?
For most households, cleaning the spray arms every 3 to 6 months keeps performance optimal. If you have hard water or run your dishwasher daily, aim for every 2–3 months. A simple habit: each time you clean your dishwasher filter (which should be monthly), quickly spin each spray arm by hand to check for stiffness or obvious debris.
When Cleaning Isn’t Enough
If you’ve cleaned the spray arms thoroughly and your dishwasher still underperforms, the issue may lie elsewhere:
- Clogged or damaged filter: The filter below the spray arm traps food particles. A blocked filter reduces water pressure to the spray arms.
- Weak water pressure: If the spray arms spin slowly or erratically, the water inlet valve or pump may not be delivering adequate pressure.
- Cracked or warped spray arm: A visibly cracked spray arm should be replaced — they’re inexpensive parts available for all major brands.
For more on dishwasher performance, see: Dishwasher Drying Tricks That Actually Work.
Local Dishwasher Help in the Tri-Cities
If a thorough spray arm cleaning doesn’t restore your dishwasher’s performance, there may be a mechanical issue that needs professional diagnosis. Tricity Repairs serves Coquitlam, Port Coquitlam, and Port Moody with expert dishwasher repair — from inlet valves to control boards to drain pumps. Call us at (604) 359-5952 and we’ll get your dishwasher cleaning like new again.
Summary
Cleaning your dishwasher spray arms is a quick, low-cost maintenance task that makes a noticeable difference in cleaning performance. Remove each arm, clear clogged nozzles with a toothpick, soak in vinegar to remove mineral scale, and reinstall securely. Done every 3–6 months, this simple step keeps your dishwasher working efficiently and extends its lifespan — no technician required.